How to Create and Manage Block Courses in Smart Assessor

What’s This For?
This guide helps Assessors create and manage Block Courses for their students. You can set rules, such as start dates, locations, or prerequisites
Who Can Use This?
- Assessors can create and reuse blocks as needed.
- Blocks can include activities and resources for the course.
Step-by-Step Guide
- On the Grey Ribbon, click the Block Tab.
- You’ll see a list of existing blocks.
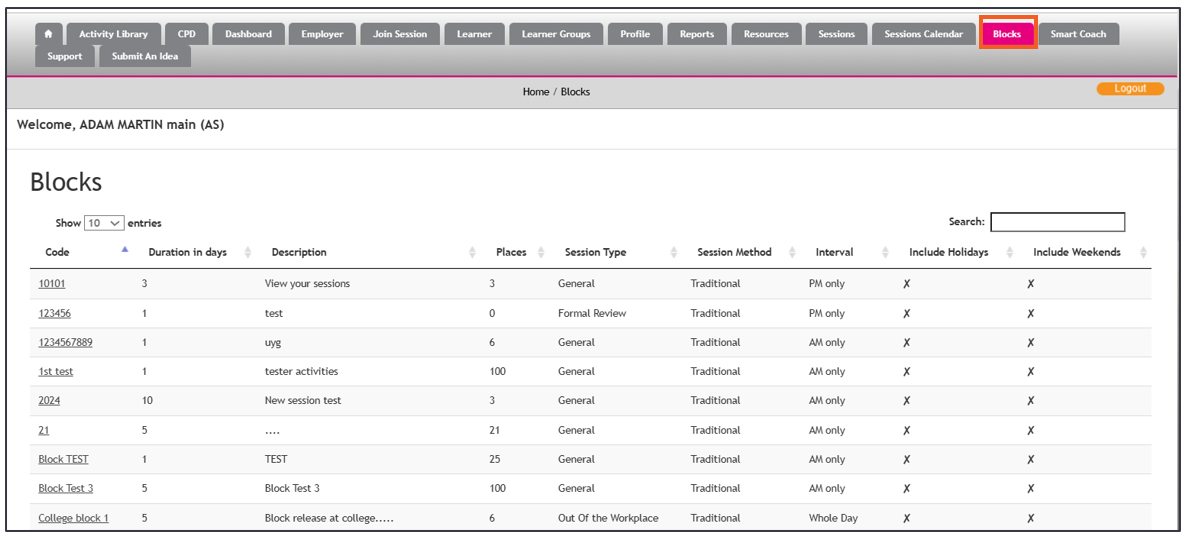
- Click the Create Block button.

- Fill in the fields.
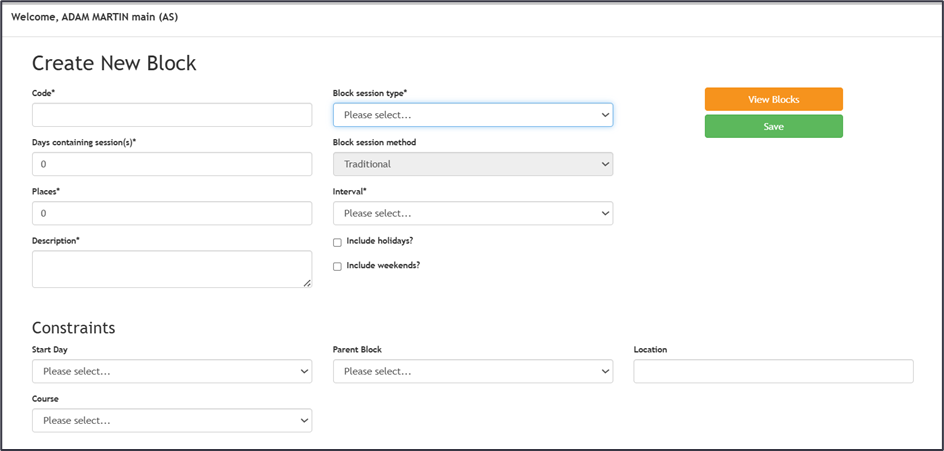
Fields with an asterisk (*) are mandatory. Make sure to complete these!
- Add optional rules for the block, such as:
- Start Date: Specify when the block begins.
- Location: Where the session will take place.
- Prerequisites: Set rules like completing another block first

If you set rules, you won’t be able to book the block unless all conditions are met.
Why Use Blocks?
- Simplifies course planning for Assessors.
- Allows you to set clear rules and prerequisites.
- Makes it easy to reuse and manage blocks for multiple students.