Creating a Group Evidence Folder
Smart Assessor provides the opportunity to create evidence groups, the following guide provides the process of creating an evidence group to assist in keeping the Evidence Library organised and that can be mapped against units and criteria.
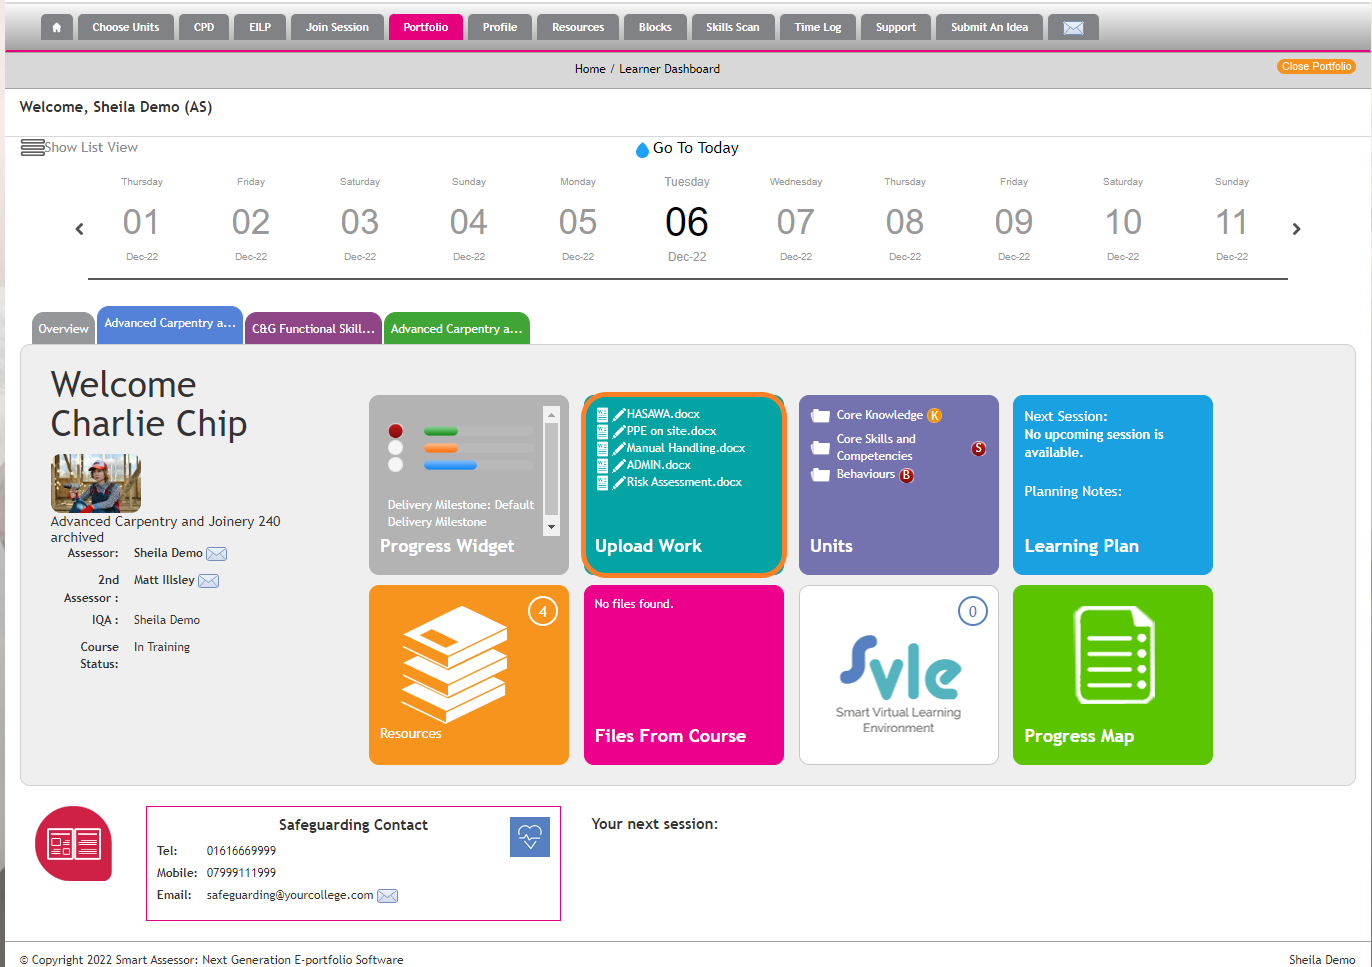
- Access the Learner's portfolio, navigate to the Learner’s course dashboard and click on the Upload Work tile to access the evidence library.
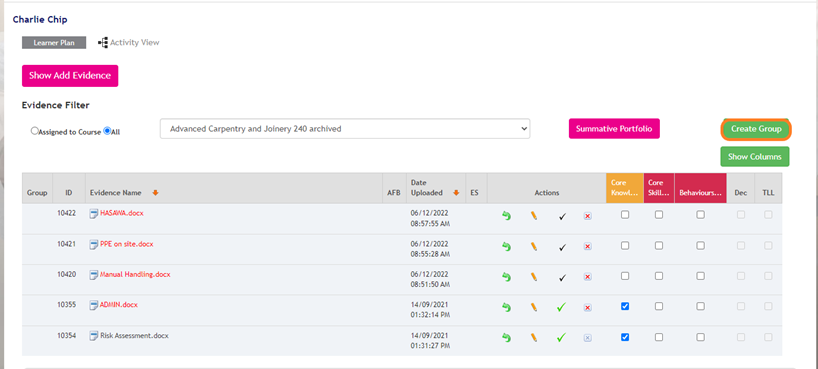
- Within the evidence library click on the Create Group button:
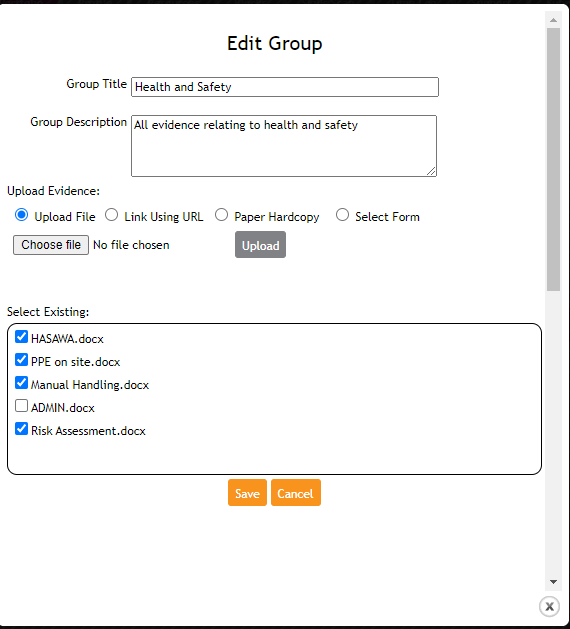
- The Create New Group modal will display, give the folder a name and a description.
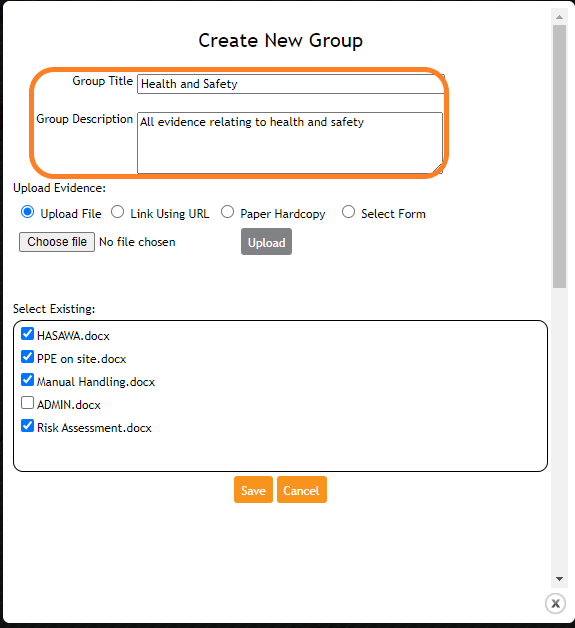
- Here you can upload new evidence by selecting one of the Upload Evidence options.
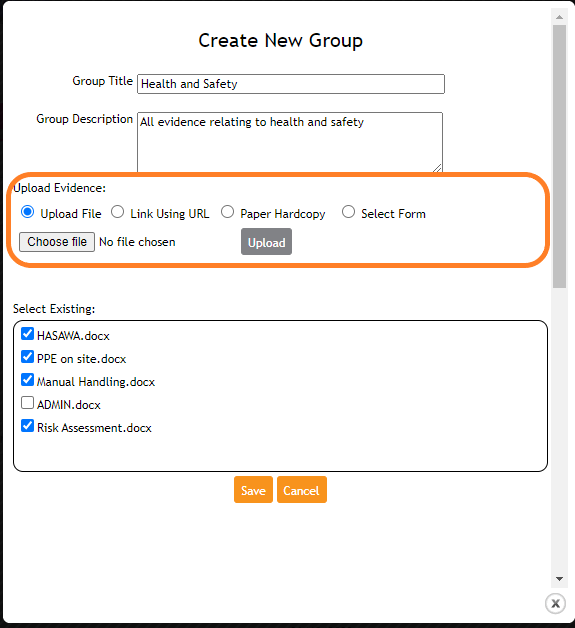
- You can also select one or more existing pieces of evidence to add to the folder by selecting the checkbox in the Select Existing area.

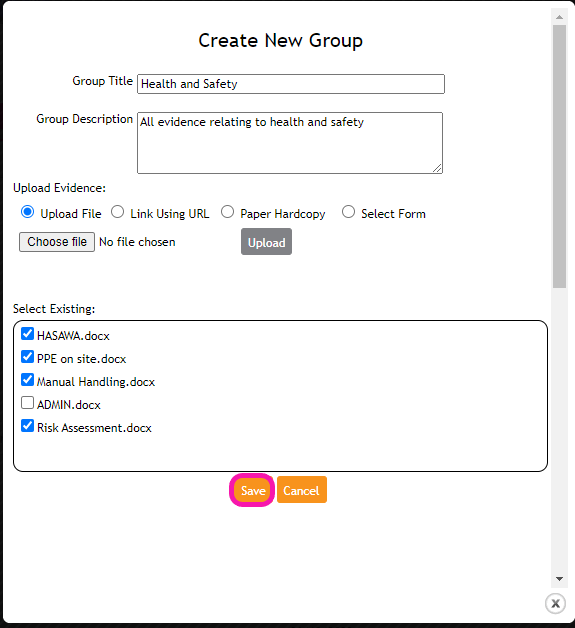
- Once complete, select the Save button.
- Once the evidence group is saved it will display within the evidence library as shown below. You can select the arrow to expand the folder and view the contents.

- Selecting the pencil icon will allow you to edit the content of the folder. Any evidence that is removed from the Group folder will return to the main Evidence Library.