Pre-Mapped Activities
OVERVIEW
This guide will show the user how pre-mapping activities can save time in the assessment process.
PREPARATION
User must know which criteria the planned activity will meet.
USER RESTRICTIONS
Users will need the following permissions to be able to view and use the above pages: -
- Master Admin
- Assessor
An Assessor and a Master Admin can create an Activity, an Assessor can only edit an Activity that they have created whereas a Master Admin can edit all Activities.
DETAILS
Once an activity has been created pre-mappings can be applied by selecting the Optional PC Mappings + icon. This is available for the Activity both in the Activity Library and in the Learning and Assessment Plan.

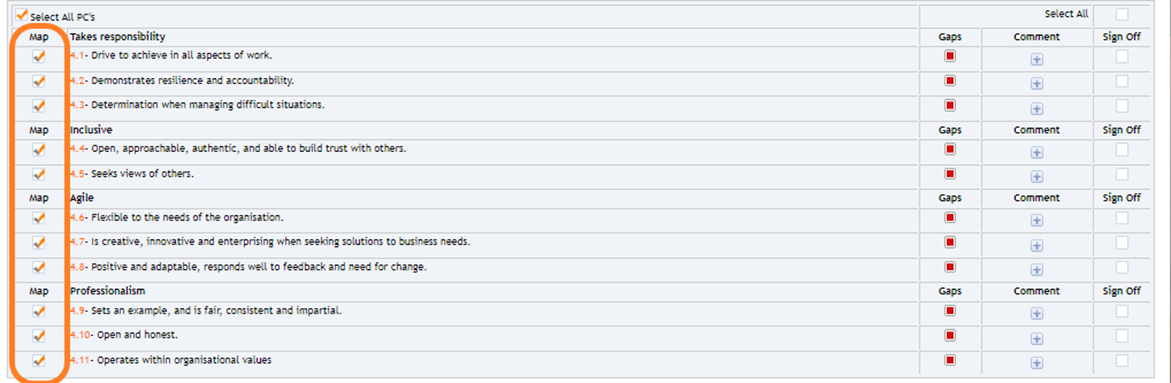
Mappings will be displayed for the unit(s) selected within the Activity. Select which mappings you want to be displayed using the options in the top left. The example below has “To Know” criteria showing. Tick the criteria that will be met on successful completion of the Activity. If desired, there is an option to select all.

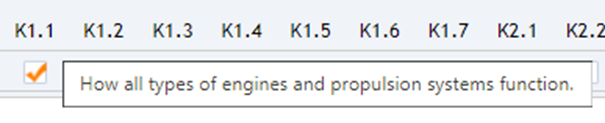
Hovering over the code will display the details for that criterion.
Once you are happy with your selection, select Submit.
When an Activity has been assigned to a Learner in the Learning and Assessment Plan and the Learner has completed the Activity, the status of the Activity will show as In Progress.
Please Note: SVLE linked activities will automatically show as In Progress when the Learner starts the Assessment. The Assessment will appear in the Evidence Library when the Learner has completed the Assessment.
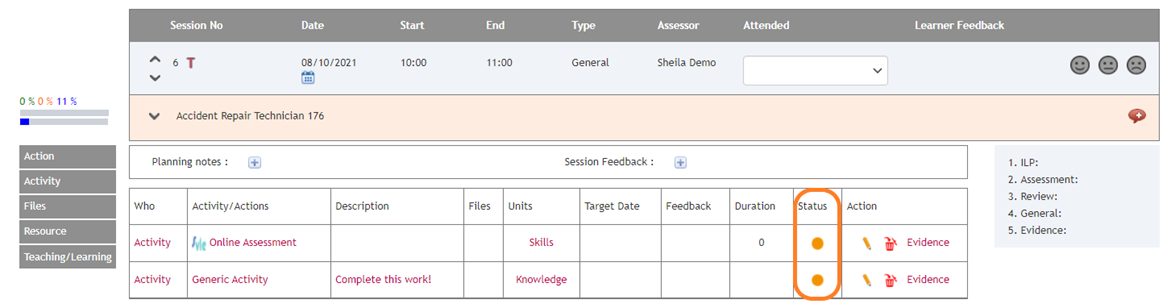
At this stage, Evidence linked to pre-mapped Activities, both Generic and Online, will display in the Evidence Library with the Unit(s) the Activity is linked to ticked. This qualification does not have any mappings applied to it, so the colour of the Unit column header appears red.

Select the black tick in the action menu to display the pre-mapped criteria.

At this point, the mappings will be displayed as grey “Learner” ticks.

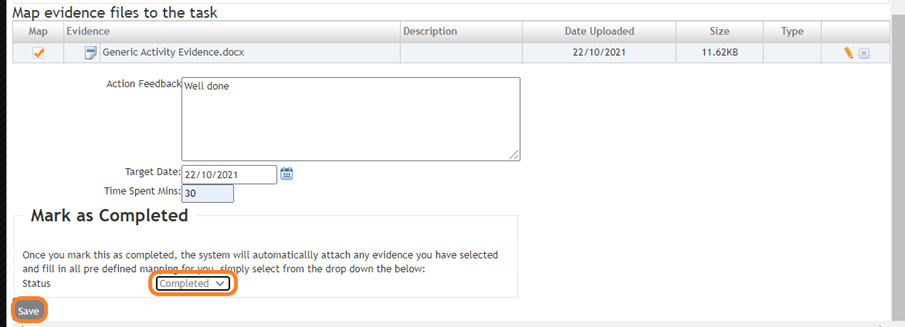
The Assessor can then mark the Evidence as complete in the usual manner from the Learning Plan and select Save.
Please Note: The only way to complete Smart VLE Online Activities and apply these mappings automatically is to select Resubmit on the Evidence Description page.

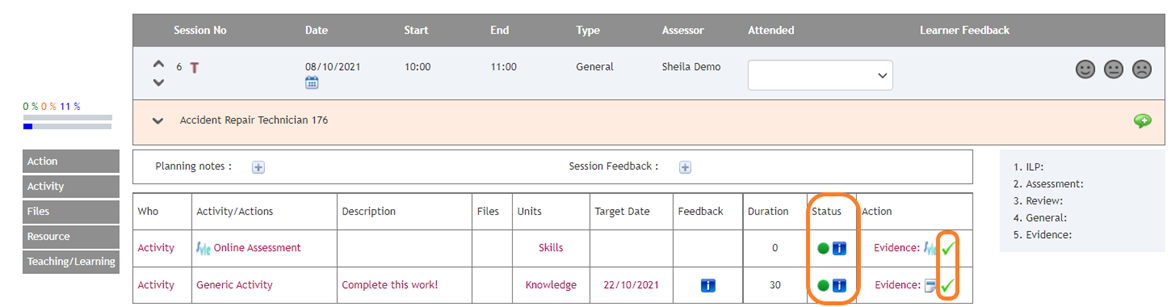
If the evidence was uploaded by the Assessor, the Activities will now display in the Learning and Assessment Plan with status Complete and with green ticks in the Action column to link to the Mappings page.
In the Evidence Library, the mappings have now been applied so the tick in the Action column is now green and the Unit column headers have changed to orange to denote the Unit now has Evidence mapped against it but is not yet signed off.

When viewing the mappings, the pre-mapped criteria will now display with orange (Assessor) ticks and the gap analysis will display as orange. The assessor can then manually select any PCs that have been fully met to sign off which will change the gap analysis to green for that PC.

Please note: If the evidence was uploaded by the Learner, the mappings will not be automatically transformed into Assessor mappings so the Unit column header will remain red if no other evidence is mapped against that unit.

The Assessor must confirm the mapping by selecting the ticks that they approve for that piece of evidence; these will show as orange/ grey ticks when approved.
Once the pre-mappings have been approved and saved by the Assessor, the Unit progression will be applied for the appropriate units.