Uploading Evidence
Uploading Evidence
There are many different ways to add evidence to a Learner's portfolio. To start, navigate to the Learner's Course Dashboard, select the Upload Work tile.
Uploading a File
The system defaults to uploading a file functionality. To upload a file from your computer, select the Browse button.
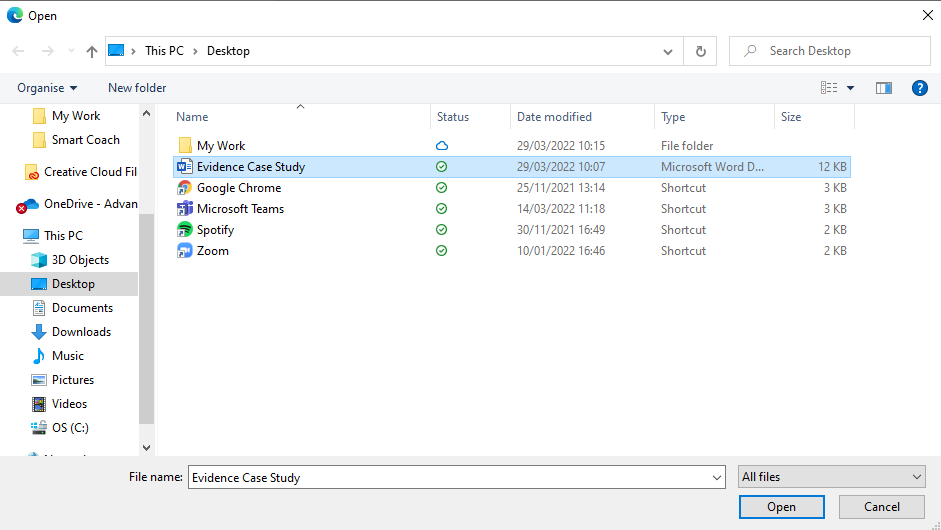
Locate the file that you want to uplaod and select open.
Alternatively, you can drag and drop your file into the box.
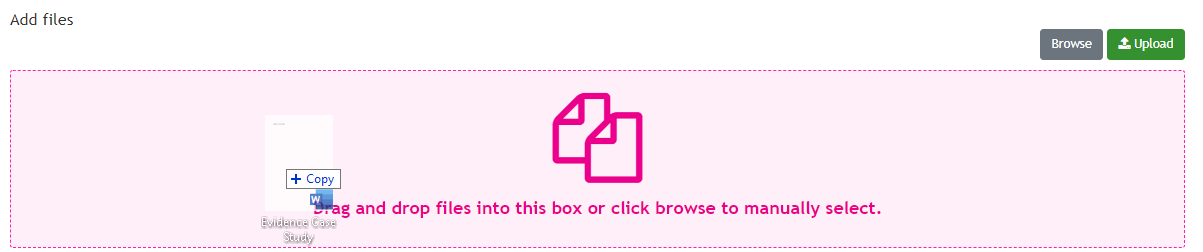
The selected file will appear in the table.

Click the Upload button to upload the file to your Evidence Library.
Link Using URL
Select the Link using URL tab and then entter the full URL for the location of the evidence.

Select the Verify Link button to check the link. This will open a new page in your browser and redirect you to the URL entered.
Once you are happy that the correct URL has been entered, select Add Link.
Paper Hardcopy
When evidence can't be uploaded and a paper hardcopy exists of that evidence, you can provide a detailed description of the location of that evidence including information like page numbers.
Select Add Paper Evidence to upload that desctiption to your Evidence Library.

Use Other Completed Units
There may be occasions when you can use units that have previously been completed as recognised prior learning.
Select the Browse other completed units button to brose the units that have already been signed off in Smart Assessor.

When you have identified the unit that you want to use, select the Use as evidence button for that unit.
Enter details about the selected unit and select Save to upload this unit to your Evidence Library.
Select New Form
Select a New Form from the forms available in the drop-down list and then click Add New Form too add the seelcted form to your Evidence Library

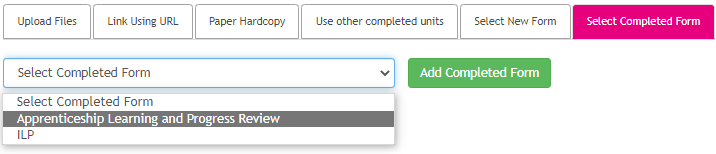
Select Completed Form
Select a Completed Form from the forms available in the drop-down list and then click Add Completed Form to add the selected form to your Evidence Library.
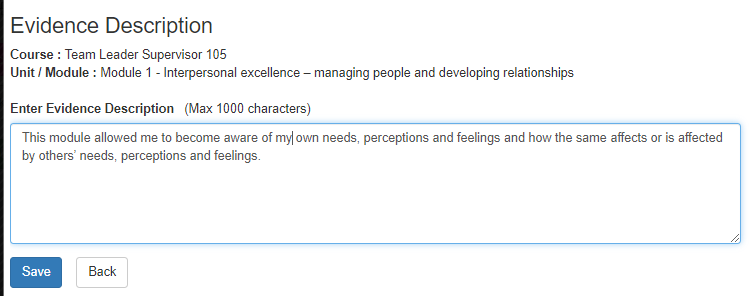
Evidence Description Page
When you upload a piece of evidence to the Evidence Library, you are taken to the Evidence Description page. This can also be accessed by selecting the pencil icon in the row for that piece of evidence.
You can provide further details about the related evidence in the Description field.

You can also add additional information in the Assessor Feedback section.

Alternatively, you can upload external feedback by choosing a file and then selecting the Upload button.
If appropriate, you can add some additional feedback in the Points for Improvement field.
Select the Assessment Method you have used to carry out the assessment for this piece of evidence.
The key for the Assessment methods is located at the bottom of the Evidence description page.
If you want this evidence to be linked to the Time Log, select the Yes option in the Evidence to be used in time log section (defaults to no).
You can optionally add additional details about the assessment including the session details and grade if appropriate.
Once you have completed your assessment, select the appropriate action button:
Resubmit - this will save your changes and the learner will be advised that the evidence needs to be resubmitted based on your feedback. If the evidence is linked to a Smart VLE assessment, this will automatically send the assessment to the learner for them to attempt again.
Assessment Complete - this will save your changes and mark the assessment as complete. If the evidence is a Smart VLE assessment, this is the only option that will apply any pre-mappings and automatically progress the status of the linked activity to complete.
Cancel - this will close the evidence description page and will not save your changes.
If you have a copy of your signature saved on your computer, you can upload this file by selecting the Choose File button in the Upload Copy of Signature section.
The name of the selected file will appear next to the button. Select Upload to upload that file to this evidence description.
FInally, select the checkbox for Assessor Signature, you can also select the checkbox to mark any additional signatures that are required for that evidence.
Select Save.to save your changes.