Forms - Enrolment Form: Create New or From Template
 Updated

Forms - Enrolment Form: Create New or From Template
OVERVIEW
Smart forms are a great way to digitise your internal forms, such as formal reviews, bringing the ability to allocate and capture required signatures from learners, employers and relevant external bodies.
PREPARATION
Using two screens can benefit the creation of forms, allowing you to view two documents at the same time
USER RESTRICTIONS
Master admin - only
DETAILS
- Click Admin tab from the grey navigation bar.

- Select Forms tab, select Create New Form option.

- Select Create from Template or Create Blank to design an enrolment form.
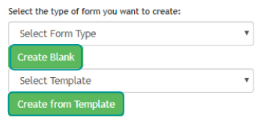
- Once a template or form type (enrolment) has been selected the ability to create a form will be available.
- To add fields, drag and drop them to the location they need to display. From the Header or Footer zone the following option
become available.
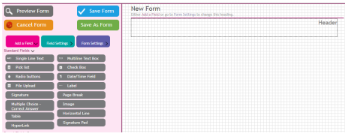
- Text boxes provides a field that users can type into. Multiline option can be customised to size.
- Pick list, check box and radio buttons provide options to be selected.
- File upload- opportunity to attach files to the form.
- Label- opportunity to type free text that display on the form.
- Signature check box option accessed by entering username and password to sign a form.
- Page break -opportunity to break the page where required. (Note* if you are going to do the PDF export you will need this)
- Multiple choice- operates in a similar way as the check box option, also provides opportunity to self-mark.
- Image – must be a JPG.
- Hyperlink- add a link to websites.
- Signature pad – opportunity for a non-user of Smart Assessor to sign form.
- Pre-set fields for Learner, Assessor and Employer provide opportunity to draw information in from Smart Assessor onto the form.
- Adding a field will swap the field to settings tab.
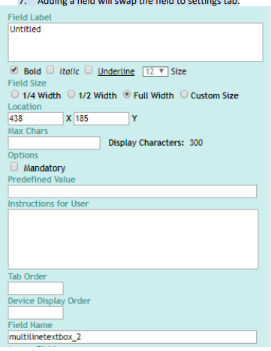
- Field label -will display on top of the field
- Custom size- opportunity to adjust height and width.
- Location – opportunity to move and locate the field.
- Max characters – prevents going over the maximum character.
- Mandatory box- mandates all fields to be completed on the form (Note* form cannot be signed off until all fields have been filled in)
- Predefined value -displays information recorded
- Instructions for User. Displays a float over box.
- Tab Order – operates left to right
- Device Display Order – opportunity to order each field 1st field number 1, 2nd field 2 and so on so forth.
Tab and Device order need to be inputted if you are going to use the form OFFLINE
- To copy or delete a field next to each other, use the plus or minus option.
The plus is to duplicate and the minus to delete
- Select the form settings tab to name and provide a description prior to saving the form.