The STANDARDS and QUALIFICATIONS MODULE - all you need to know!
 Updated

What is the STANDARDS and QUALIFICATIONS MODULE?
The Standards and Qualifications Module is designed to be a ‘qualifications authority’ for Advanced Education platforms - the initial focus is on Smart Assessor, but eventually the module will extend to other products such as ProMonitor.
The Standards and Qualifications module is built on our brand-new learning experience platform using the very latest technology. It uses data from the IfA and OfQual to ensure that the correct versions of Standards and Qualifications are available. This will provide a more streamlined and efficient way to add Standards and Qualifications to Smart Assessor. The data from IfA and OfQual is updated daily.
The first stage of the work allows you to search for Apprenticeship Standards from the IfA database and other Qualifications from the OfQual database, and make edits before publishing to Smart Assessor. It also includes the functionality to be able to add bespoke Qualifications from scratch that are not on the databases.
All of the information you need is contained in this helpdoc. There is also a quick video below that steps you through the process!
Logging in
To gain access to the Standards and Qualifications module, you need to have your account activated by our support team - please raise a ticket with the support desk for this.
To log in to the Qualifications module, navigate to https://app.smartskillshub.co.uk/ . If you need help setting up your account, please contact our support desk.
API Configuration
The permission required for this area is:
- Configure Smart Assessor Integration
You will need to set up your API key to enable you to publish IfA Standards and OfQual Qualifications to your Smart Assessor client.
To add a new connection, select the Configuration menu item and click on the Smart Assessor Integration tab. You will need to complete the following fields:
- URL
- Username
- Secret
- API Key
You will be able to obtain the set-up information that you need via the Advanced Education Service Desk. Click on the Add button and your connection is set up and ready for you to complete the exports. You can update your connection by following the same process and overwriting the fields that require updating. Click on Update to set up the new connection.
To view the list of integration logs, click on the Smart Assessor Integration within the Qualifications module. You will see a table of integration logs that will contain the following information:
- GUID ID
- Export type
- Standard
- Qualification
- Triggered by (user name)
- Triggered at (Date/time)
- Status
- Queued
- Processing
- Complete (if the integration was completed successfully)
- Failed (if the integration was not completed successfully)
- Cancelled
You can filter the requests by selecting Filter from the Sort/Filter tool to restrict the requests that you can see based on the filter options that you select. The Sort/Filter icon is shown below.

You can sort the integration requests by ‘Triggered At’ by selecting Sort from the ‘Filter/Sort’ tool
To view further details of a request, click on the GUID ID of that request.
Creating Apprenticeship Standards
Permissions for this area are:
· Create/Edit Qualifications
· View Qualifications
View Qualifications allows you to view this area but not to search for, import and edit Apprenticeship Standards, or to publish them to your Smart Assessor client.
Search for an Apprenticeship Standard
To import a Standard that has been searched for you will need the permission Create/Edit Qualifications
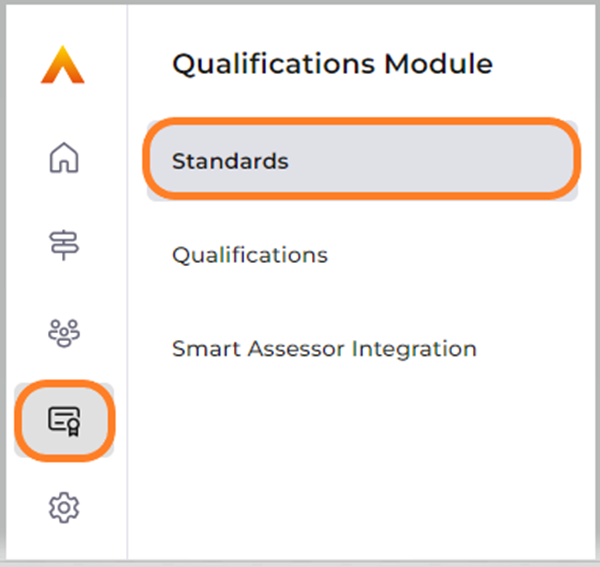
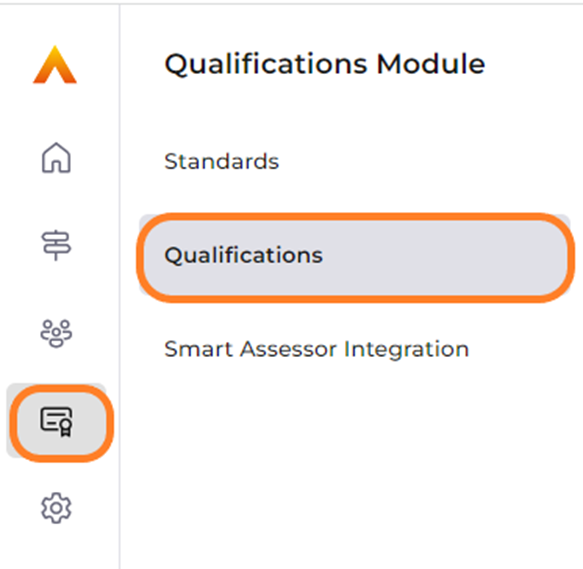
To search for an Apprenticeship Standard that you need to add to Smart Assessor, select the Qualifications icon from the side bar and then click Standards
This will take you to a list of Standards that have already been imported to your tenant. If there are no Standards yet imported to your tenant, the list will be empty.
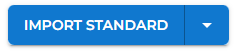
Select ‘Import Standard’
This will take you to the ‘Search for a Standard’ page. To complete a search, add the full or partial Standard title, LARS code or Reference code into the search bar. The system will then begin to search for Standards that match the search terms you have entered.
If there are multiple results that match the terms you have entered, each result will sit within an accordion that can be expanded to show further details about the Standard. This is to enable you to see the relevant information required before you choose to import the Standard to your tenant.
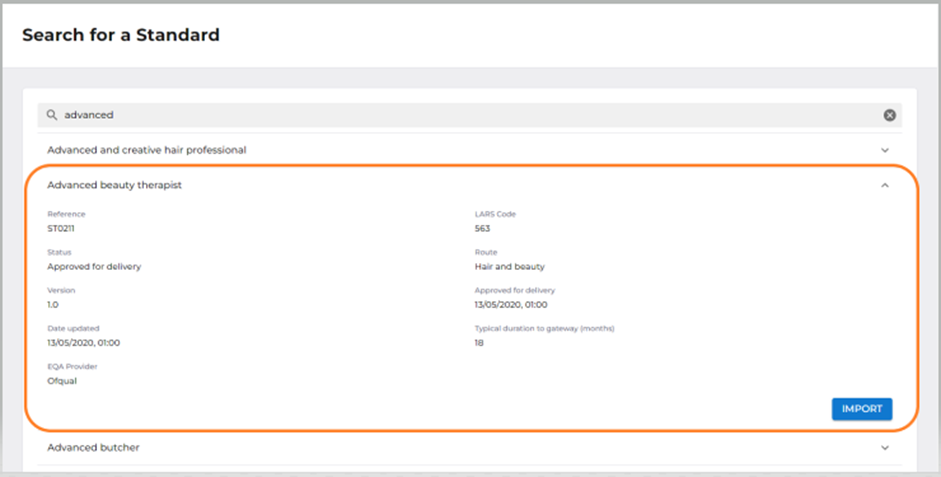
To import a Standard to your tenant, click the ‘Import’ button in the accordion.

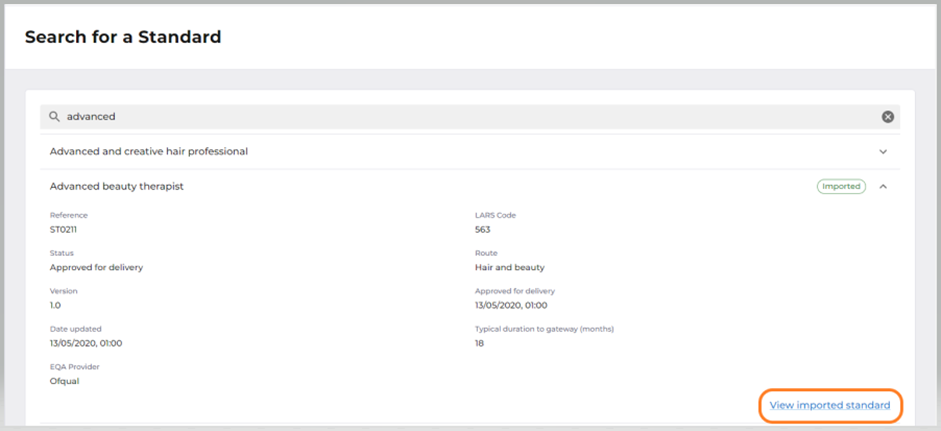
Once the import has taken place, the import button will disappear and, in its place, will be an option to ‘View imported Standard’. Clicking this option will take you to the full Apprenticeship Standard details pages.
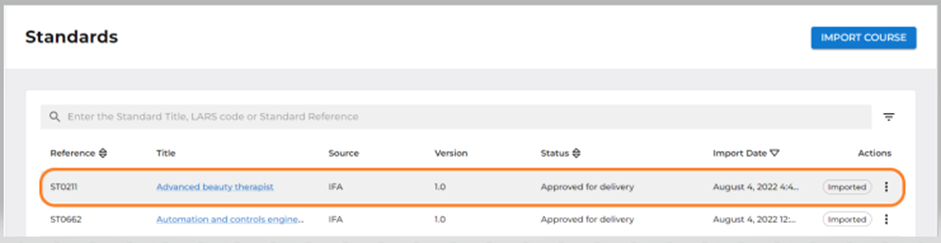
The list of Standards page will now contain the Standard that was imported, and you’ll see it at the top of the list.
Please note – not all Standard are yet in a format in the IfA database that the information can be extracted. As more Standard are structured to the new ‘Duty’ format, they will become available. Additionally, a search will only return ‘Approved for Delivery’ or ‘Retired’ Standards. Retired Standards can be found but not imported. Standards in the following statuses:
- Standards in development
- Proposals in development
- Potential Standards
- Withdrawn Standards
Cannot be searched for as these cannot be offered to learners. As soon as they become ‘Approved for Delivery’, they will be available in the search
View Details of an Imported Apprenticeship Standard – Details, Overview & KSBs
To view the full details of the Standard, select the action menu and select ‘View details’

You can also view a Standard by clicking the Standard Title
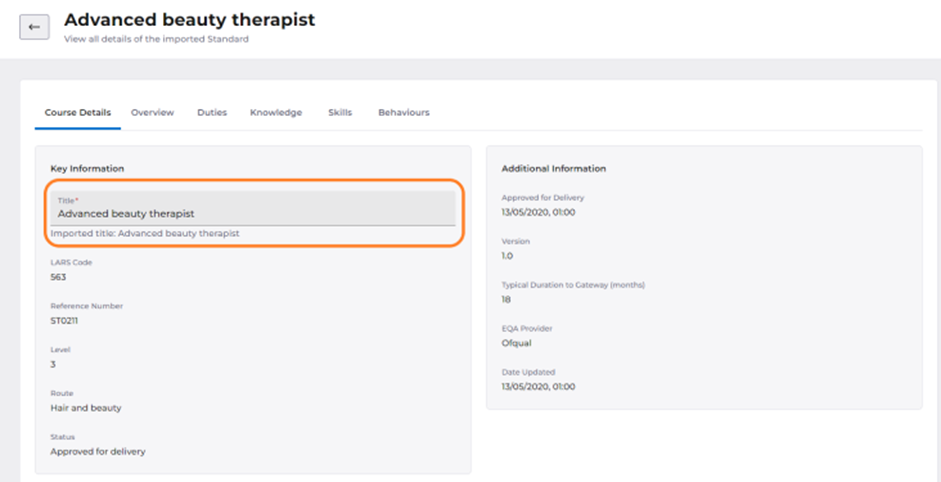
Upon Selecting to view a Standard you will be taken to the Standard details page which includes all Standard key information.
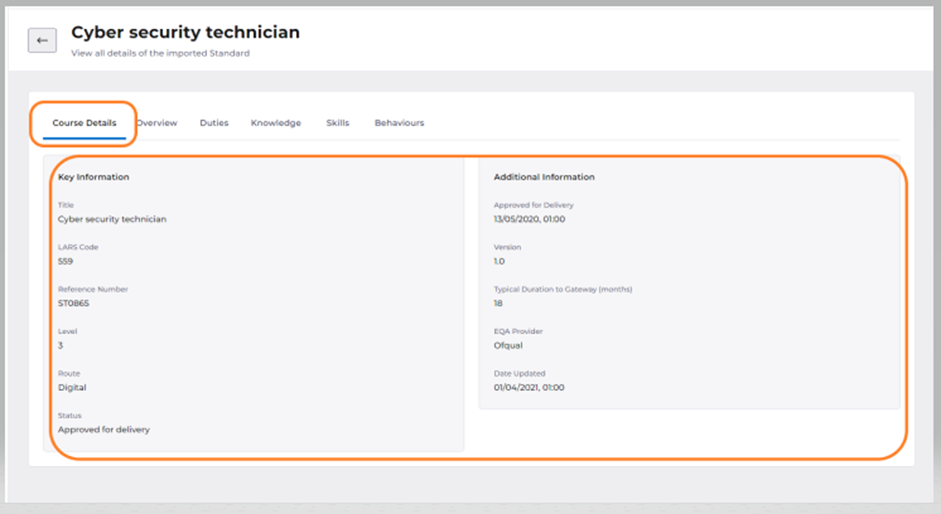
From here you can select from several different tabs, depending on what you wish to view.

You can select ‘Overview’ which gives the overview of the role and occupation summary of the Standard as defined by the IfA.
Selecting ‘Duties’ will show the Duties for the Standard along with the Knowledge, Skills and Behaviours of each Duty.
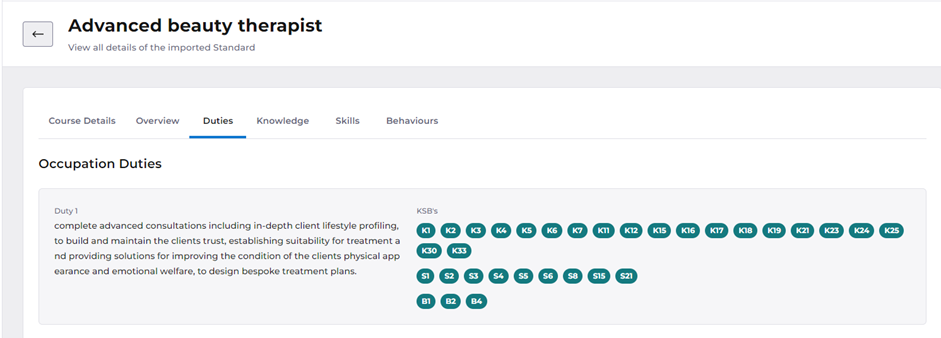
Hovering over each of the green chips shows the full detail of the Knowledge, Skill or Behaviour and clicking on it will take you to the full detail in the relevant tab.
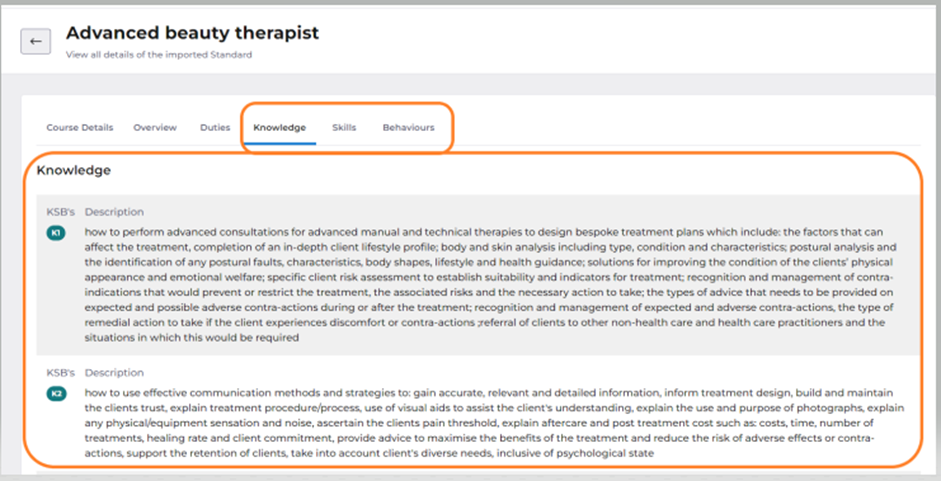
You can look at the Knowledge, Skills, and Behaviours in full in their relevant tab.
Update the Standard Title
This requires the permission Create/Edit Qualifications and users that only have the ‘View Qualification’ permission will not be able to see the functionality.
A Standard title can be changed before it is exported to Smart Assessor. Select the ‘Details’ tab. The Standard title field is editable by simply overwriting the existing Standard title. The imported title will still be displayed beneath the updated title field for reference.
Once the Standard has been exported to Smart Assessor, it is no longer editable.
Adding New Knowledge, Skills, and Behaviours
This requires the permission Create/Edit Qualifications and users that only have the ‘View Qualification’ permission will not be able to see the functionality.
New knowledge, skills and behaviours can be added to the Standard by users that like to break them into smaller elements before exporting the Standard into Smart Assessor. To do this, select the relevant Knowledge, Skill or Behaviour tab and select the arrow next to the item that you want to break down which will then display and ‘Add new’ button which you can see in the image below.
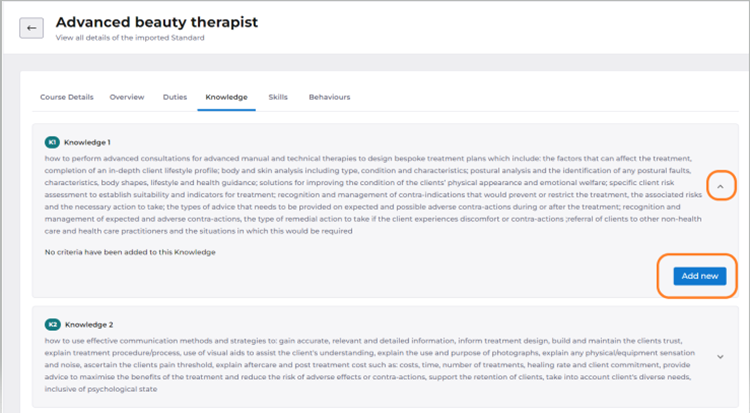
Click on ‘Add new’.

This will open a tray that displays the KSB criteria in full. To break the criteria down into smaller elements you can type the criteria in the box ‘New xxx criteria’ and select ‘Add another criteria’ to continue adding criteria until you have added all criteria. Click ‘Save’ for each criteria that you add. The full criteria is displayed to make it easy to cut and paste rather than having to type them all out manually.
Once you have completed all criteria for a single KSB, toggle off ‘Add another criteria’ and click ‘Save’’. Continue this process for each knowledge, skill, and behaviour that you want to break down before exporting the Standard to Smart Assessor. When you then export the Standard only the newly added KSBs will be exported rather than the full KSB that has been imported from the database.
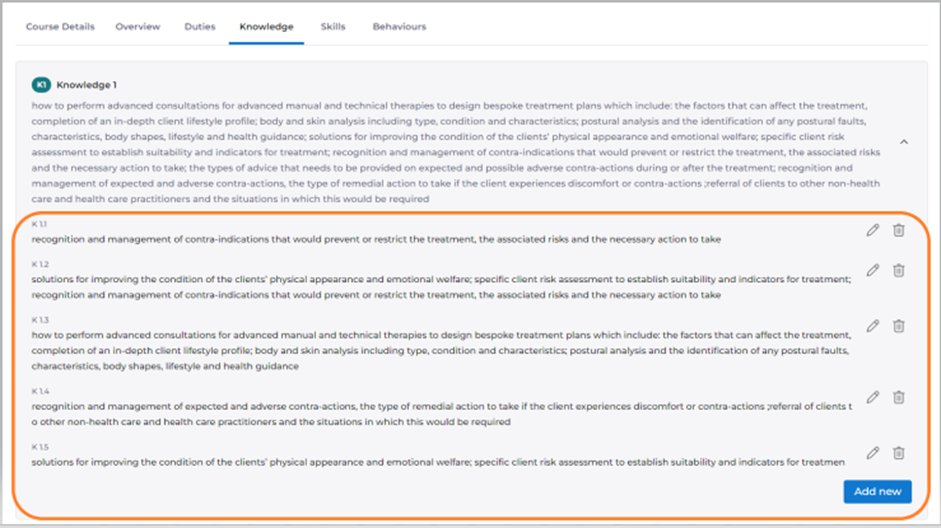
Once you have completed the breakdown of a single KSB you will see the new criteria that you have created and which will be imported into Smart Assessor, listed beneath the original imported Knowledge, Skill, or Behaviour as you can see in the following screenshot. There is also the option to edit and delete the criteria that you have created by using the icons next to each individual criteria.
This process can only be done before the export to Smart Assessor and once the Standard has been exported, this functionality will no longer be available.
Exporting an Apprenticeship Standard to Smart Assessor
This requires the permission Create/Edit Qualifications
To export the Standard to Smart Assessor, return to the list of Standards by using the back arrow that you’ll see at the top of the page.

Then select the action menu of the imported Standard that you want to export to Smart Assessor.

The Standard will no longer display the ‘Imported’ chip which means that the Standard has been successfully exported to Smart Assessor and you will be able to find it in the Smart Assessor Course Builder.
To delete a Standard that has been imported into your tenant, select the delete option in the action menu. Standards that have been exported to Smart Assessor do not have this option and cannot be deleted. Once you have exported a Standard to Smart Assessor, the only option in the action menu will be to ‘View Details’.
Non-Apprenticeship Courses ('Qualifications')
Permissions for this area are:
- Create/Edit Qualifications
- View Qualifications
View Qualifications allows you to view this area but not to search for, import and edit Qualifications, or to publish them to your Smart Assessor client.
Search for a Qualification
Importing a Qualification that has been searched for requires the permission Create/Edit Qualifications
To search for a Qualification that you need to add to Smart Assessor, select the Qualifications icon from the side bar and then click Qualifications.
This will take you to a list of Qualifications that have already been imported to your tenant. If there are no Qualifications yet imported to your tenant, the list will be empty.
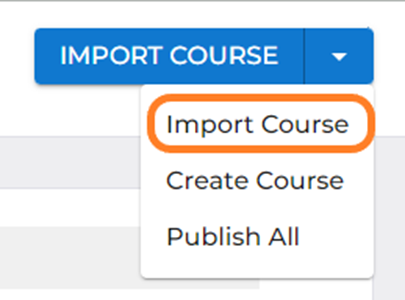
Select ‘Import Course’ using the dropdown from the ‘Import Course’ button selection.
This will take you to the ‘Search for a Qualification’ page. To do a search, add the full or partial Qualification title, or Ofqual Reference number into the search bar. The system will then begin to search for Qualifications that match the search terms you have entered.
The search filter for Qualifications automatically defaults to qualifications that have the Ofqual status ‘Available to learners’.

If you need to change this, use the ‘filter’ icon next to the search bar where you can select filters to add Qualifications to the search results in the following Ofqual statuses:
- No longer available to new learners
- No longer awarded
- Not yet available to new learners
However, whilst you can see search results and details for Qualifications in other statuses, these cannot be imported and exported to Smart Assessor.
The filter bar can also be used to filter the Qualifications by level.
If there are multiple results that match the terms you have entered, each result will sit within an accordion that can be expanded to show further details about the Qualification. This is to enable you to see the relevant information required before you choose to import the Qualification to your tenant.

To import a Qualification to your tenant, click the ‘Import’ button in the accordion.

If the import button is disabled, it is because the Qualification does not have the ‘Available to Learners’ status and therefore cannot be imported. You can still manually create Qualifications using the ‘Create Qualification’ option.

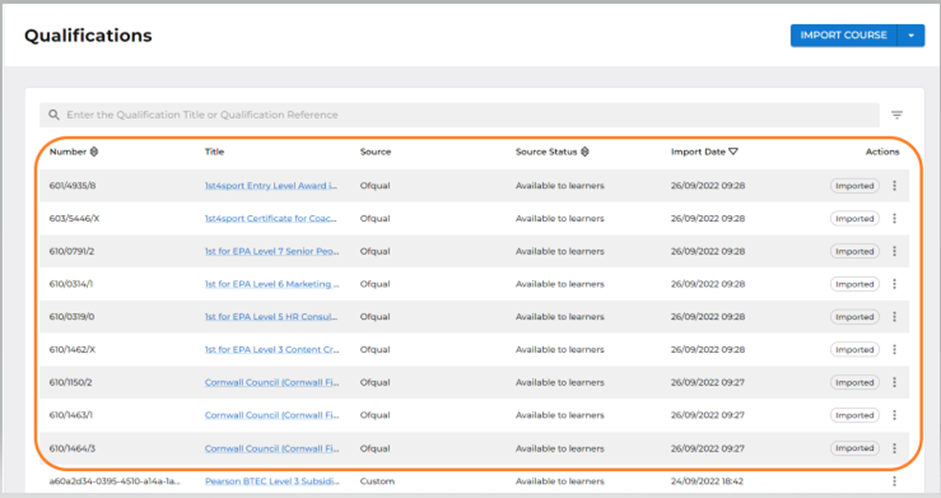
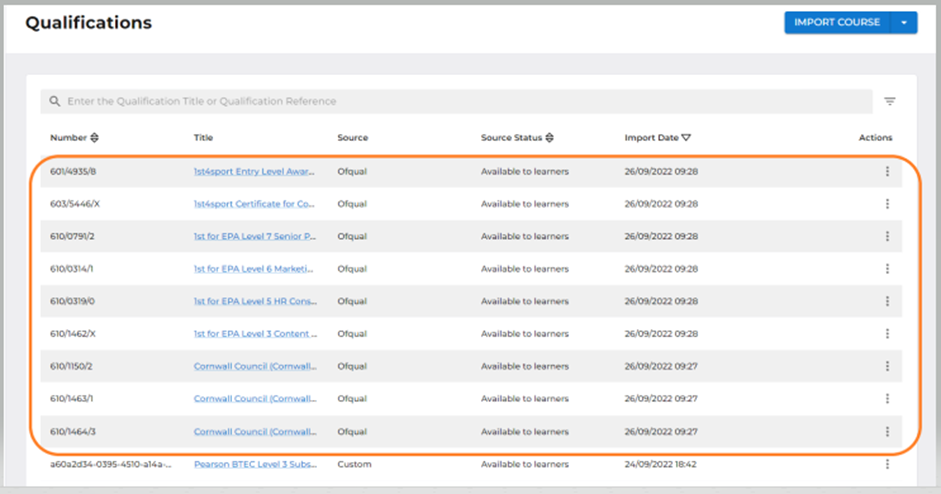
Any search results that have already been imported to the tenant will have an ‘Imported’ chip in the listing so that you can easily see this.
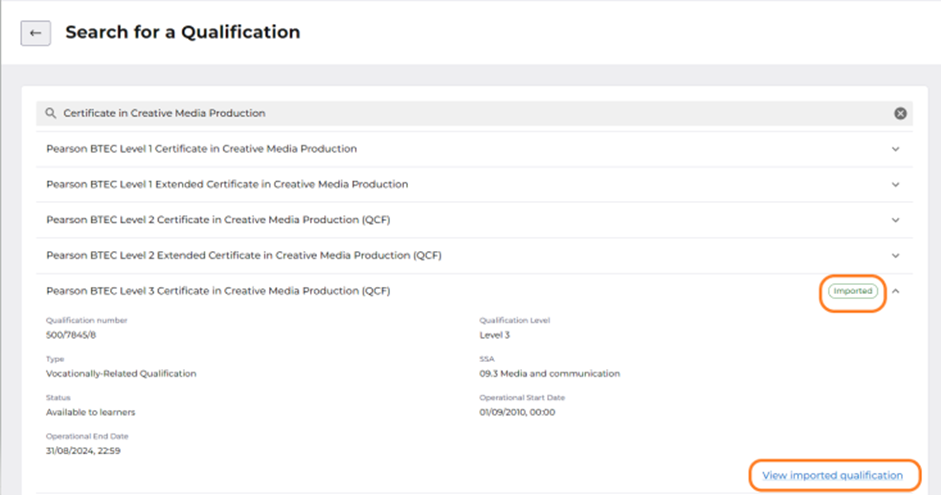
Once the import has taken place, the import button will disappear and, in its place, will be an option to ‘View imported Qualification’. Clicking this option will take you to the full Qualification details pages.
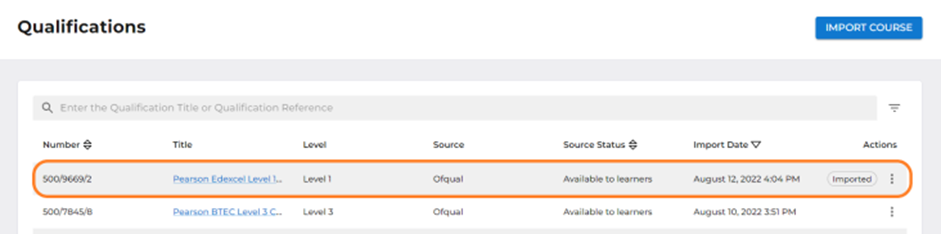
The list of Qualifications page will now contain the Qualification that was imported and you’ll see it at the top of the list of imported Qualifications.
View Details of a Qualification
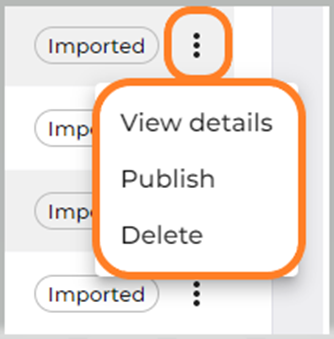
To view the full details of the Qualification, select the action menu and select ‘View details’ or click on the title of the Qualification.
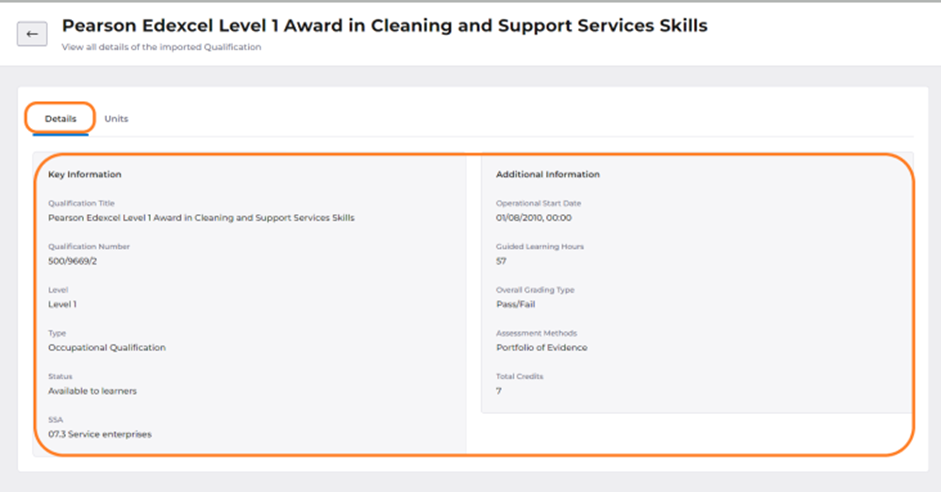
Upon Selecting to view a Qualification you will be taken to the Qualification details page which includes all Qualification key information.
Update Qualification Title
This requires the permission Create/Edit Qualifications and users that only have the ‘View Qualification’ permission will not be able to see the functionality.
A Qualification title can be changed before it is exported to Smart Assessor. Select the ‘Details’ tab. The Qualification title field is editable by simply overwriting the existing Qualification title. The imported title will still be displayed beneath the updated title field for reference.
Once the Qualification has been exported to Smart Assessor, it is no longer editable.
Qualification Units
Next to the ‘Details’ tab, there is a ‘Units’ tab where you can see details of the Qualification units.
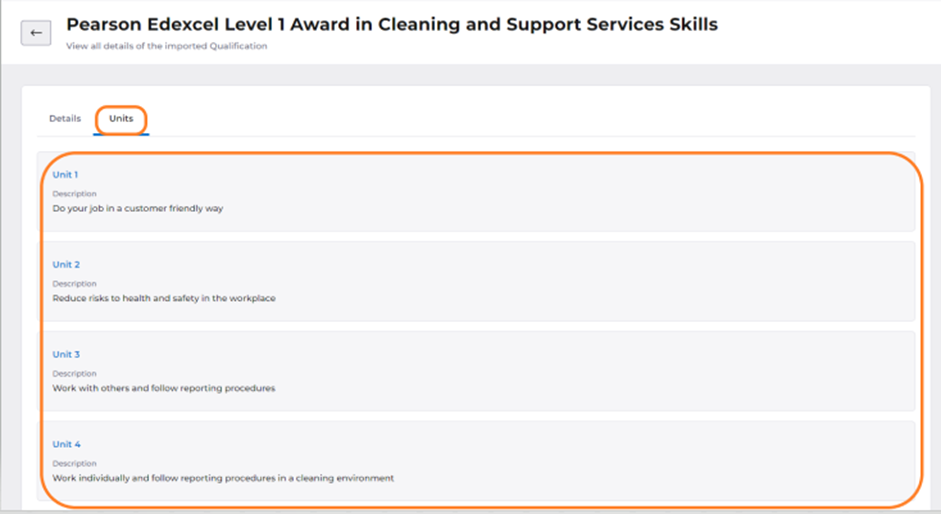
To view the details of a unit, simply click on the unit number.
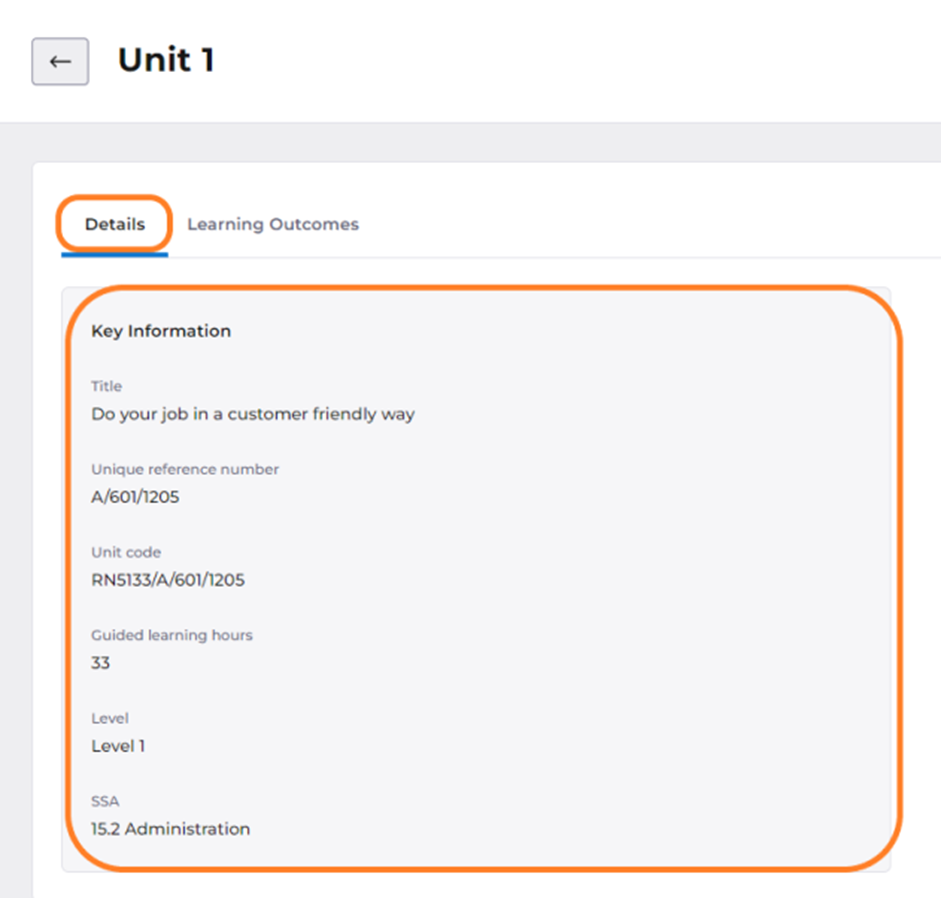
This will take you to a page holding all the details of the unit for the Qualification.
Qualification Learning Outcomes
If there learning outcomes for the unit, you will see a tab next to the ‘Details’ tab that is called ‘Learning Outcomes’.
Please note – not all Qualifications have learning outcomes in the Ofqual database and where this is the case, you will not see this tab. Additionally, learning outcomes are not formatted on the database such that they can easily be extracted. Therefore, learning outcomes can be edited before exporting the Qualification to Smart Assessor so that they can be updated and tidied up before the export.
Editing a Learning Outcome
This requires the permission Create/Edit Qualifications
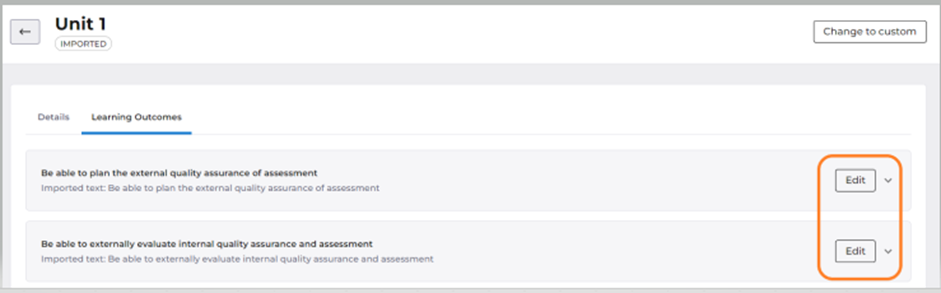
Clicking on to the ‘Learning Outcomes’ tab will display a list of learning outcomes that have been imported from the Ofqual database. Each learning outcome will have its own accordion. Within each accordion is an ‘Edit’ button.
Clicking on the ‘Edit button will open a tray that is prepopulated with the learning outcome as it has been imported from the Ofqual database.
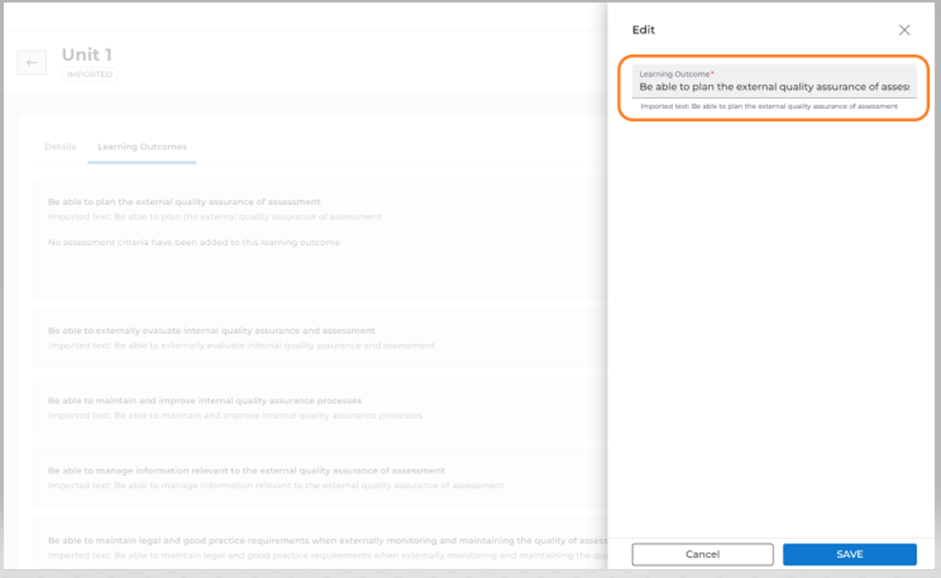
Here you can overwrite the learning outcome as you would like it to appear in Smart Assessor. Click ‘Save’ to save the learning outcome and return to the list of learning outcomes. You will be able to see your edited learning outcome and beneath it you will see a record of the text as it was originally imported for reference, although this will not be exported to Smart Assessor.
Add a New Learning Outcome
This requires the permission Create/Edit Qualifications
To add a custom learning outcome, click on the ‘Change to custom’ button at the top of the page. This will show that learning outcomes have now been customised from those that have been imported from the Ofqual database.

You will then see a new button ‘Add Outcome. Click this button. This will then open a tray where you can simply type in the new learning outcome and click save.

Delete Learning Outcome
This requires the permission Create/Edit Qualifications
Once you have clicked the ‘Change to custom’ button, all learning outcomes will have a delete button in their specific accordion. Use this to delete any learning outcome that you do not wish to export to Smart Assessor.
Qualification Assessment Criteria
This requires the permission Create/Edit Qualifications
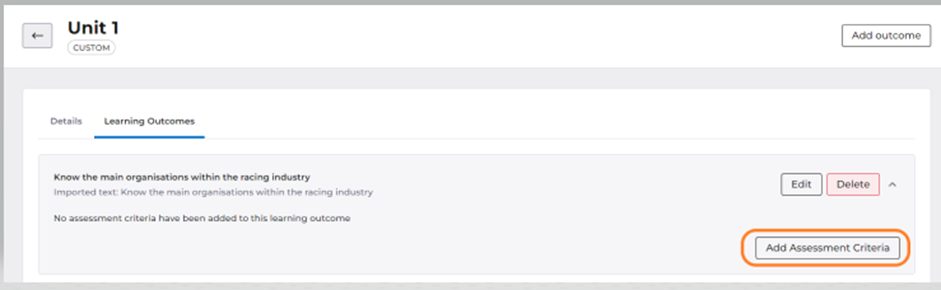
When the learning outcome accordion is expanded, you can add assessment criteria to each learning outcome.
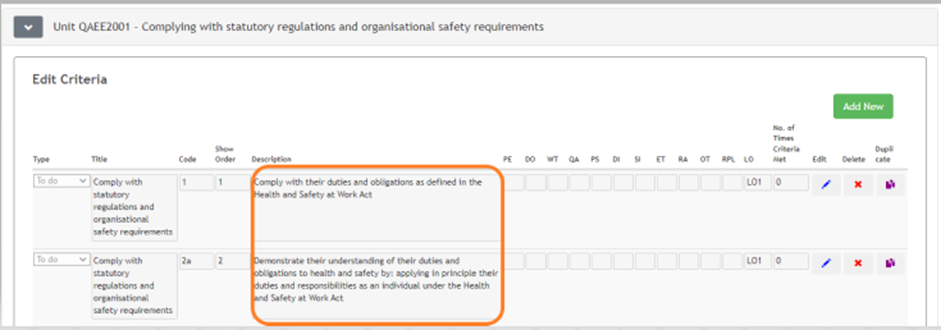
These assessment criteria become the ‘Descriptions’ within the unit criteria (learning outcomes) in Course Builder (as shown in the screenshot below)
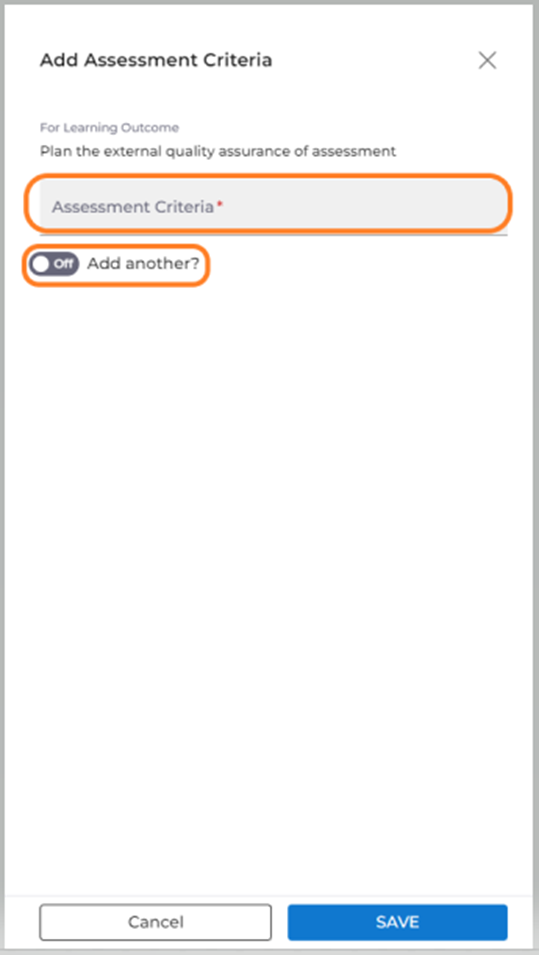
Click ‘Add assessment criteria’ which will open a tray. The tray will display the learning outcome that you are adding assessment criteria to, and you can add the criteria in the text box. Toggle ‘Add another? To the on position and save your criteria. You can then continue to add as many criteria as you need. When this is complete, toggle ‘Add another?’ back to off, click ‘Save’ and you will be returned to the list of learning outcomes. You will be able to see that the assessment criteria have now been added to your learning outcome.
Each assessment criteria can be edited or deleted using the edit and delete icons that you will see for each criteria.
Qualification Pathways
This requires the permission Create/Edit Qualifications
For Qualifications that have pathways, you will see an additional tab called ‘Pathways’ next to the ‘Units’ tab.

Due to formatting issues, we are currently unable to import pathways from the Ofqual database but in this tab you are able to add pathways to the Qualification manually by clicking on ‘Add Pathway’.

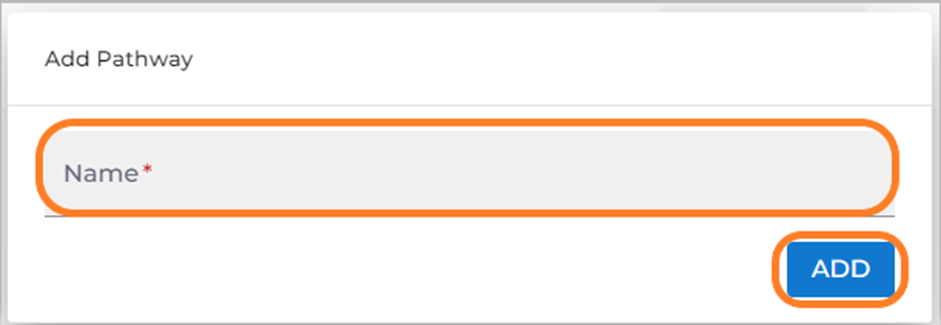
A modal will open where you can add the pathway name.
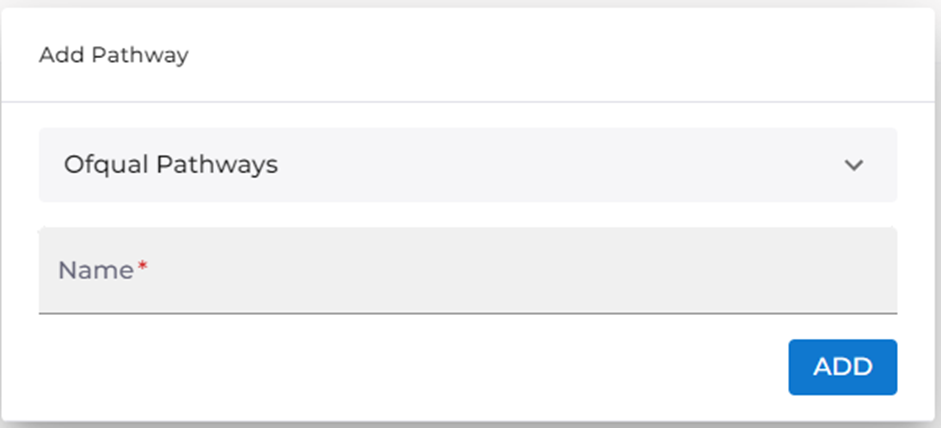
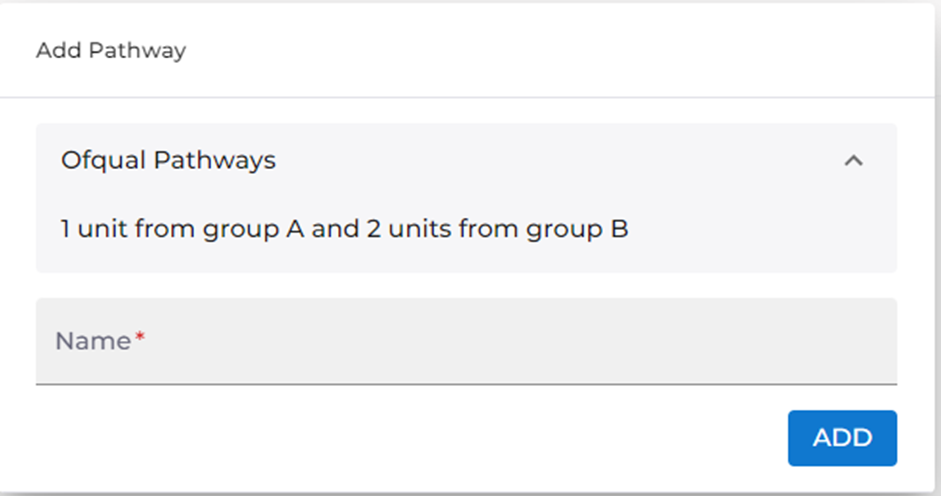
In the modal there is a dropdown that contains the information that we have been able to extract from the Ofqual database, which means that if the information is correct, you can copy and paste it into the pathway name. Click on the ‘Add’ button to save the pathway to the Qualification. The ‘Pathway’ tab will not appear for Qualifications that do not have pathways in the Ofqual database.
Creating a Custom Qualification
This requires the permission Create/Edit Qualifications
From the Qualifications list page, select ‘Create Course’ from the ‘Import Course’ dropdown.

This will take you to the ‘Create Course’ Screen where you can add the Qualification details and select ‘Create’.
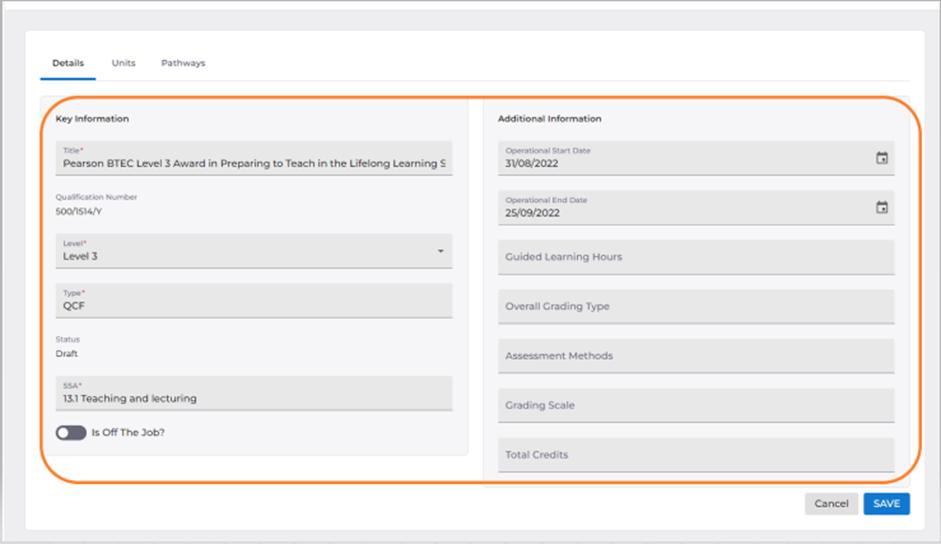
This takes you to the ‘Details’ screen which will display the information that you have added.
The Qualification status will be displayed as ‘Draft’ because you are still creating the Qualification and cannot export the Qualification until completed.
‘Is off the Job’ will default to ‘No’ but you can change this in edit mode.
Entering ‘Edit’ mode will also display some additional fields that you can optionally complete. If these are not completed, they will not be displayed when you come out of edit mode.

Select ‘Edit’ and the information that you have added will become editable and additional fields can be completed.
Having made any changes needed, select ‘Save’.
Adding Units to a Custom Qualification
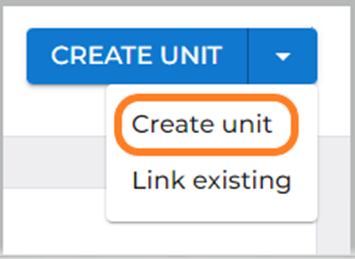
Select the ‘Units’ tab and here you can create a unit from scratch or link a unit that already exists.
To add a new unit, select ‘Create unit’ from the ‘Create unit’ dropdown.
This will open a tray where you will need to add:
- Unit title
- Unique reference number
- Unit code
- Level
Having added these details, click ‘Save’ and the unit will be added to your Qualification. There are also edit and delete options for any units that you add.
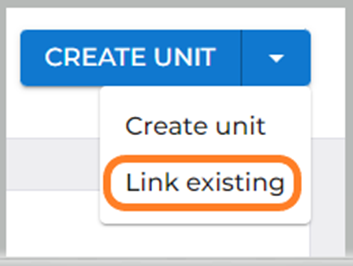
To link an existing unit, select ‘Link existing’ from the create unit dropdown
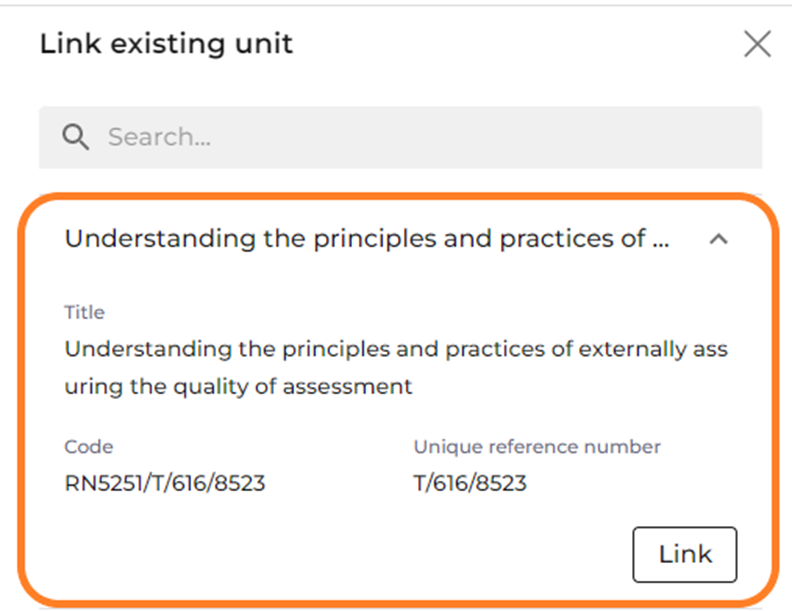
This will open a tray where you can search for a unit using:
- Title
- Unique reference number
- Unit code
Each search result will be in an accordion that can be expanded to display the title, unique reference number, and unit code of the unit code to enable you to clarify that you have selected the correct unit. Clicking the ‘Link ‘ button will link the unit to your Qualification.
Once the unit is added to your Qualification, it will have a delete option, should you wish to remove it.
Units will appear exactly as they do for Ofqual imported Qualifications (see Qualification Units)
To edit a unit, click on the unit name and then click on the edit icon in the unit details page. All fields that can be edited will then become editable. Once changes have been made, click on the ‘Save’ button.
Learning Outcomes
Each unit will have its own ‘Learning Outcomes’ tab. Here you can add learning outcomes by selecting ‘Add Outcome’ at the top of the screen.
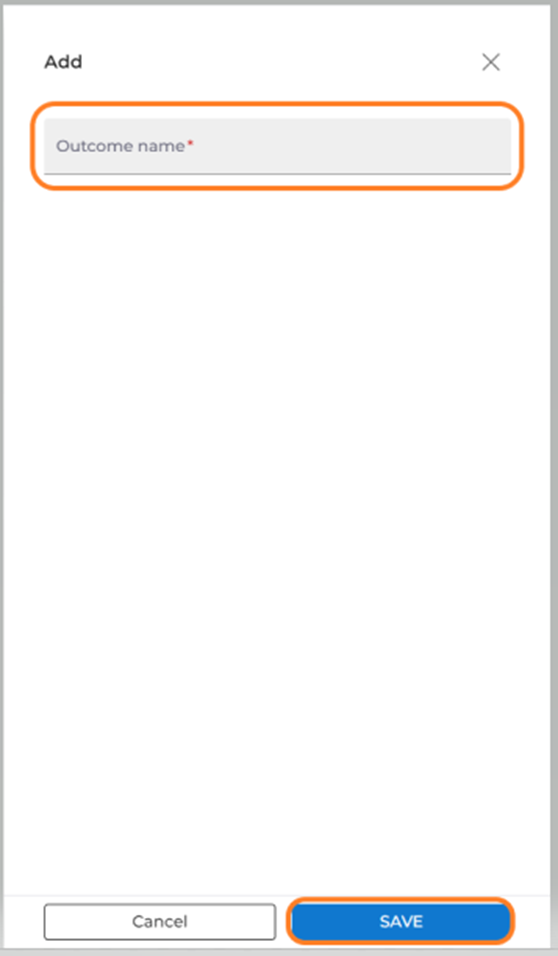
This will open a tray where you can add the name of the outcome and click ‘Save’ to save it.
Each learning outcome added has ‘Edit’ and ‘Delete’ options to make any changes needed prior to export to Smart Assessor.
Assessment Criteria
Assessment criteria can be added to learning outcomes in exactly the same way that they are added for imported Qualifications.
Pathways
All custom Qualifications have a ‘Pathways’ tab to enable you to add pathways to the Qualification. Within the ‘Pathways’ tab, click ‘Add Pathway’. A modal will open where you add the pathway name and click ‘Add’.
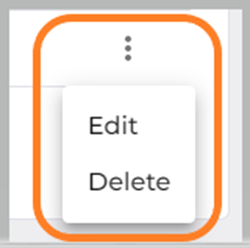
The pathway is added to the Qualification and selecting the action menu next to the pathway will give you the options to ‘Edit’ or ‘Delete’ the pathway before the Qualification is exported to Smart Assessor.
Mark as Available to Learners
Before you can export the completed custom Qualification to Smart Assessor, you will need to move it out of the ‘Draft’ status. To do this, return to the ‘Details’ screen. At the top of the screen is a button ‘Mark as Available to Learners’.

Simply click this button to update the status to ‘Available to Learners’ and the Qualification will be ready to export. If you want to put the Qualification back into draft status, simply click the ‘Mark as Draft’ button which has now replaced the ‘Mark as Available to Learners’.

Export a Qualification to Smart Assessor
To export the Qualification to Smart Assessor, return to the list of Qualifications by using the back arrow that you’ll see at the top of the page.

Then select the action menu of the imported Qualification that you want to export to Smart Assessor.

The Qualification will no longer display the ‘Imported’ chip which means that the Qualification has been successfully exported to Smart Assessor and you will be able to find it in the Smart Assessor Course Builder.
To delete a Qualification that has been imported into your tenant, select the delete option in the action menu. Qualifications that have been exported to Smart Assessor do not have this option and cannot be deleted. Once you have exported a Qualification to Smart Assessor, the only option in the action menu will be to ‘View Details’.
Publishing Multiple Standards or Qualifications
In the case where multiple Standards or Qualifications are imported, it is possible to export them all to Smart Assessor simultaneously.
To do this, select the ‘Import Course’ dropdown and choose the option ‘Publish All’.
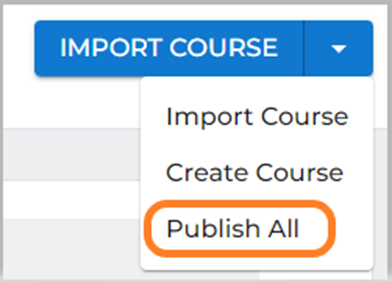
There will be a confirmation message and upon confirmation, all imported courses will be exported to Smart Assessor.
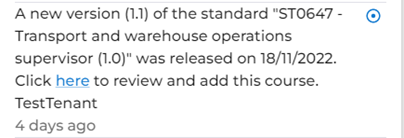
Notifications
If you subscribe to notifications, you will receive notifications when courses that you have imported have been retired or when new versions of courses are available. These notifications contain links to the relevant courses to enable easy access to take any action you need.
Subscribe to notifications
To subscribe to notifications, click on notifications at the top of the screen.
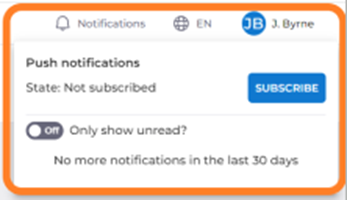
There you will have the option to subscribe to notifications and add a subscription name for your browser. The same process applies to unsubscribe at any time.